
Overview
This is an introduction to software defined networking concepts, including this hands on tutorial with OpenFlow, OpenDaylight (ODL), and OpenVSwitch (OVS). In this exercise, we’ll use Mininet to emulate three hosts connected to a single OVS switch, then connect the switch to an ODL controller. By issuing commands trough the ODL controller, we’ll insert network flows on the switch to reroute traffic destined to host 2 from host 1 to host 3 instead, while also rewriting L2 and L3 addresses so host 1 never knows any different.
Estimated time to complete is 40 minutes (very roughly). This exercise was inspired by a very similar presentation by Geddings Barrineau at the GENI networking workshop at BU earlier this Spring.12
Setup
Installing Applications
Instructions assume Ubuntu 16.04.
$ sudo apt update && sudo apt install mininet openjdk-8-jdk vim tmux wireshark libxml2-utils
$ echo "export JAVA_HOME=/usr/lib/jvm/java-8-openjdk-amd64/" >> ~/.bashrc
$ wget https://nexus.opendaylight.org/content/groups/public/org/opendaylight/integration/distribution-karaf/0.4.2-Beryllium-SR2/distribution-karaf-0.4.2-Beryllium-SR2.tar.gz
$ tar xvzf distribution-karaf-0.4.2-Beryllium-SR2.tar.gz
OpenDaylight
After installing features, the controller is also ready and waiting for connections.
$ cd distribution-karaf-0.4.2-Beryllium-SR2
$ ./bin/karaf
> feature:install odl-l2switch-switch odl-dlux-all odl-openflowplugin-flow-services-ui odl-mdsal-apidocs

Mininet
Mininet is already installed, “apt install” did it all.
Running
Start the Controller
If you are just joining and don’t yet have Opendaylight running, start it by:
$ cd distribution-karaf-0.4.2-Beryllium-SR2
$ ./bin/karaf
All the previously installed features are automatically loaded and started.
Then in Firefox, load the web UI, served on port
8181: http://localhost:8181/index.html
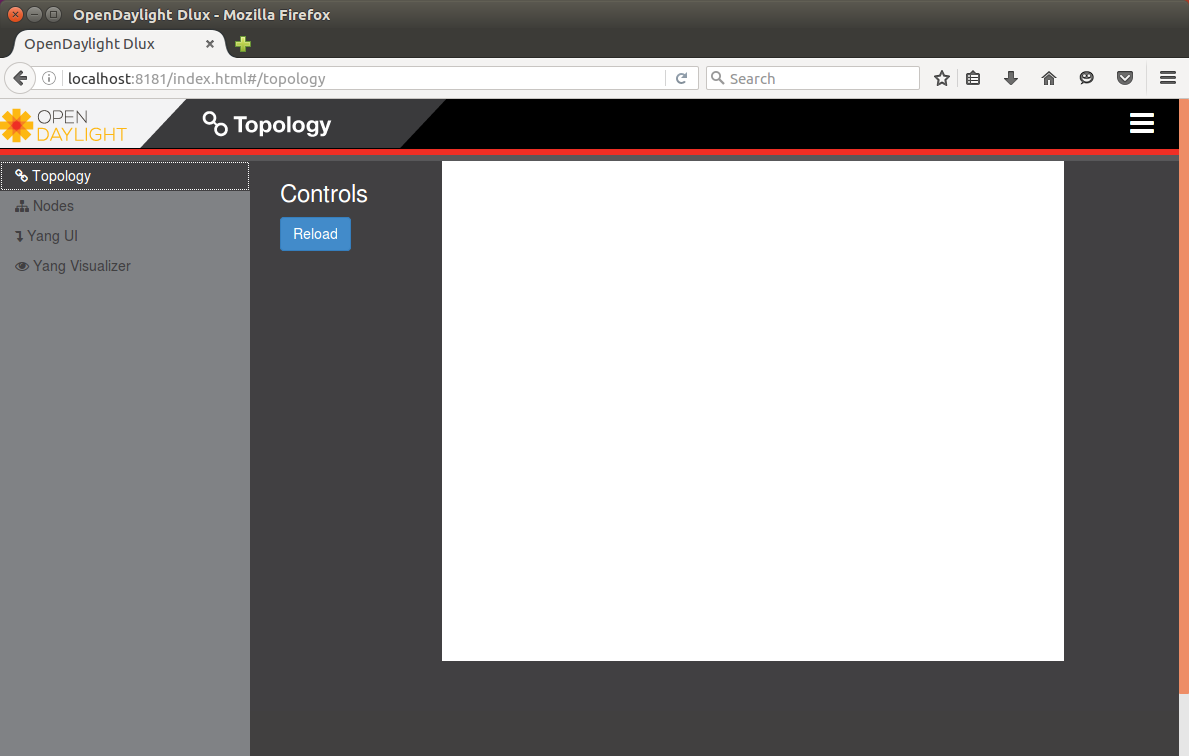
You should be presented with a login screen, the credentials for DLUX
(the openDayLight User eXperience) are admin:admin. After logging in you
should see essentially a blank slate, which is perfect, since there are not
hosts or switches on this network yet!
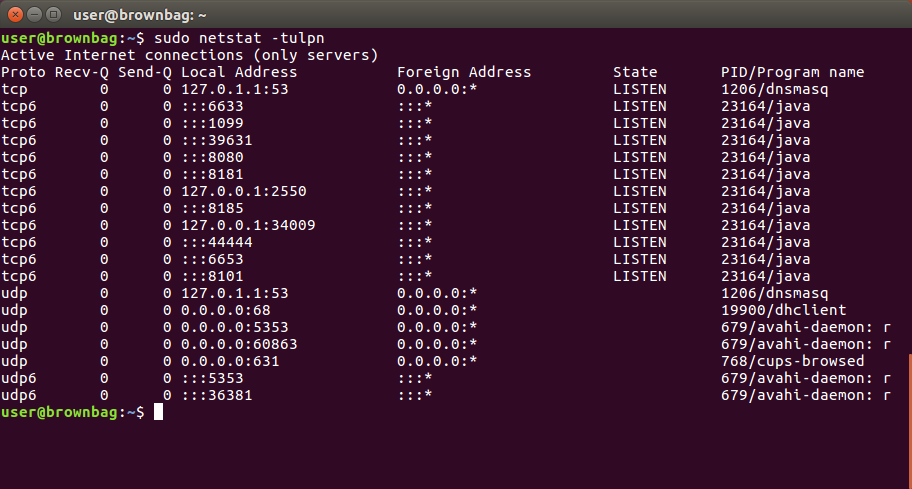
Note: Also, you can see that there is in fact *something* bound to port 6633, the default port for OpenFlow traffic (it’s OpenDaylight).
Make a Network
Now’s time to come up with a network. Mininet is our platform of choice. It offers effectively instant architecture of arbitrary complexity, running real kernel and switch code. Here’s a snippet of their impressive sales pitch.
Mininet networks run real code including standard Unix/Linux network applications as well as the real Linux kernel and network stack […]. Because of this, the code you develop and test on Mininet, for an OpenFlow controller, modified switch, or host, can move to a real system with minimal changes, for real-world testing, performance evaluation, and deployment.
Try Mininet’s equivalent of “Hello World”.
sudo mn --test pingall --topo single,3
This must be done as root. What this does is initializes a topology of 3 nodes connected to 1 switch and executes a “everybody ping everybody” test for connectivity.
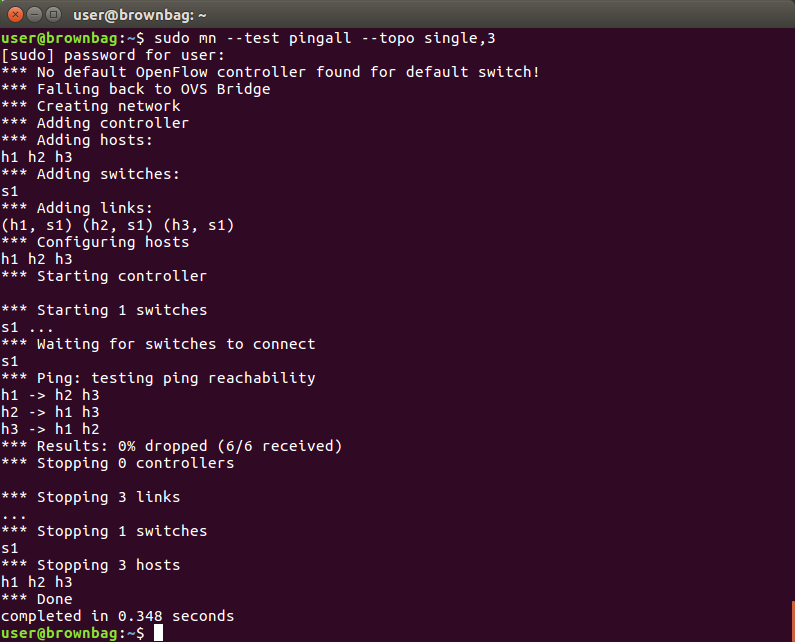
Neat. What happens if we don’t provide a test to run? Well, try it.
sudo mn --topo single,3
Instead of running tasks and exiting it provides a shell. From this shell you
can execute mininet commands, including executing *nix applications on the
emulated hosts (try h1 ifconfig, h2 ping h3, and xterm h2 for a real
shell, for example).
Notice the start of stdout in these runs prints a warning that “there’s no controller!” We have the controller running, but this emulated network knows nothing of it. So now let’s go for the real deal and hook up our network to the ODL controller.
sudo mn --topo single,3 --mac --controller=remote,ip=127.0.0.1,port=6633 --switch ovs,protocols=OpenFlow13
Here’s what these arguments do for us:
--topo single,3: Use a topology with a single switch connected to three hosts. Topology creation is also Python-scriptable for complex cases.--mac: Create these hosts with simple, non-random L2 addresses (just to make it simpler for us).--controller=remote,ip=127.0.0.1,port6633: Provides information to find our ODL controller. In real life would usually point to another host for control.--switch ovs,protocol=OpenFLow13: Use OpenVSwitch for our switch, and have it run version 1.3 of the OpenFlow protocol.
Now we’ve added details of the controller and type of switch we want, as well as specifying the version of OpenFlow. This time, the network looks to the OpenDaylight switch to operate as the controller. It will, by default, operate as a learning switch.
Note: OVS might drop a couple of the initial packets as flows are being installed, and I’m actually kinda confused and surprised by this. If drops last longer than 1-2 pings per host there’s a problem, though.
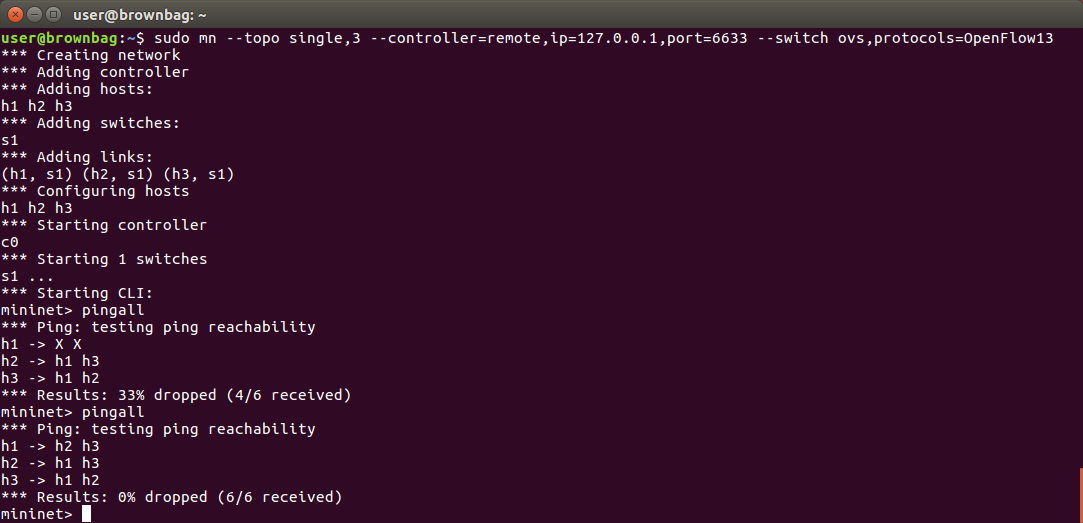
Now OpenDaylight has added flows for the 3 connected nodes, just as a learning switch would have, and you can see this in the controller’s topology (click “Reload”).
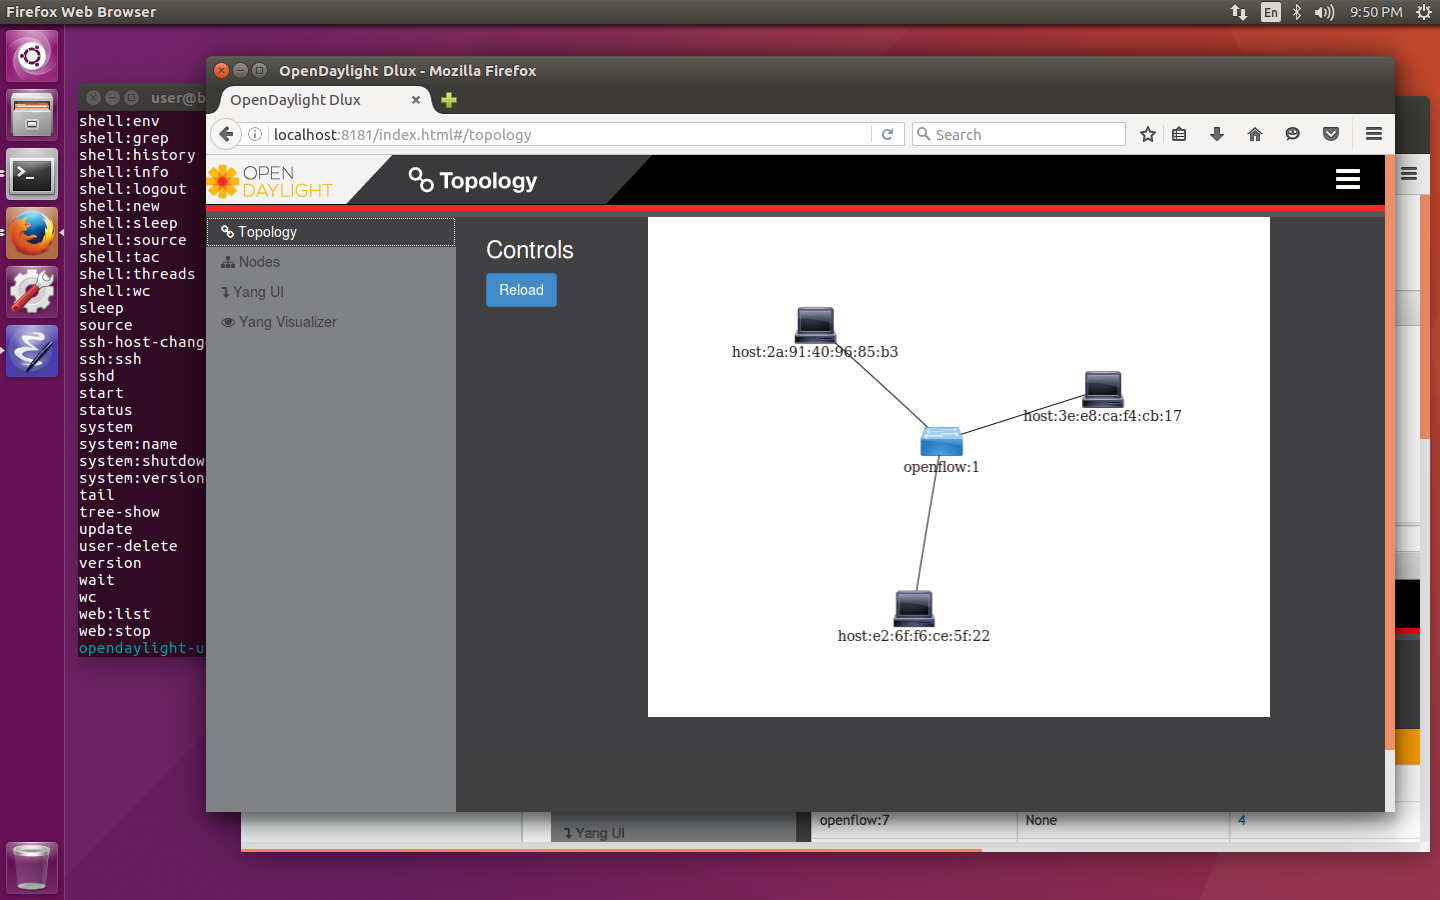
Now let’s grab some more information from the controller about our
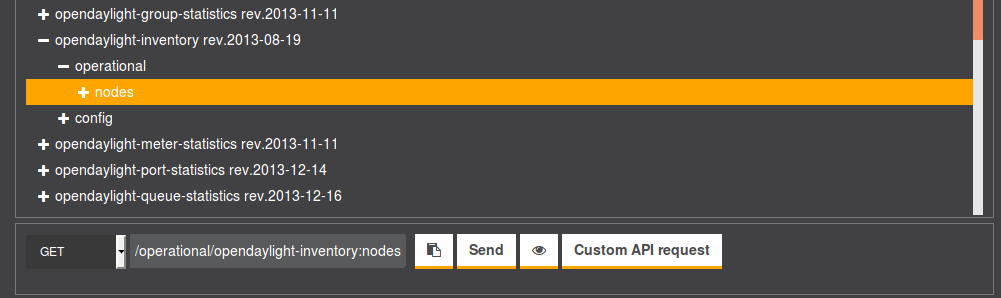
network. Navigate in the ODL UI to Yang UI, then expand
opendaylight-inventory -> operational and click on nodes. In the bottom
panel, you should see the path /operational/opendaylight-inventory:nodes. Now
click the Send button. This sends a GET request for the current operational status
to the ODL controller. We can also see all information about the connected
devices and installed flows.
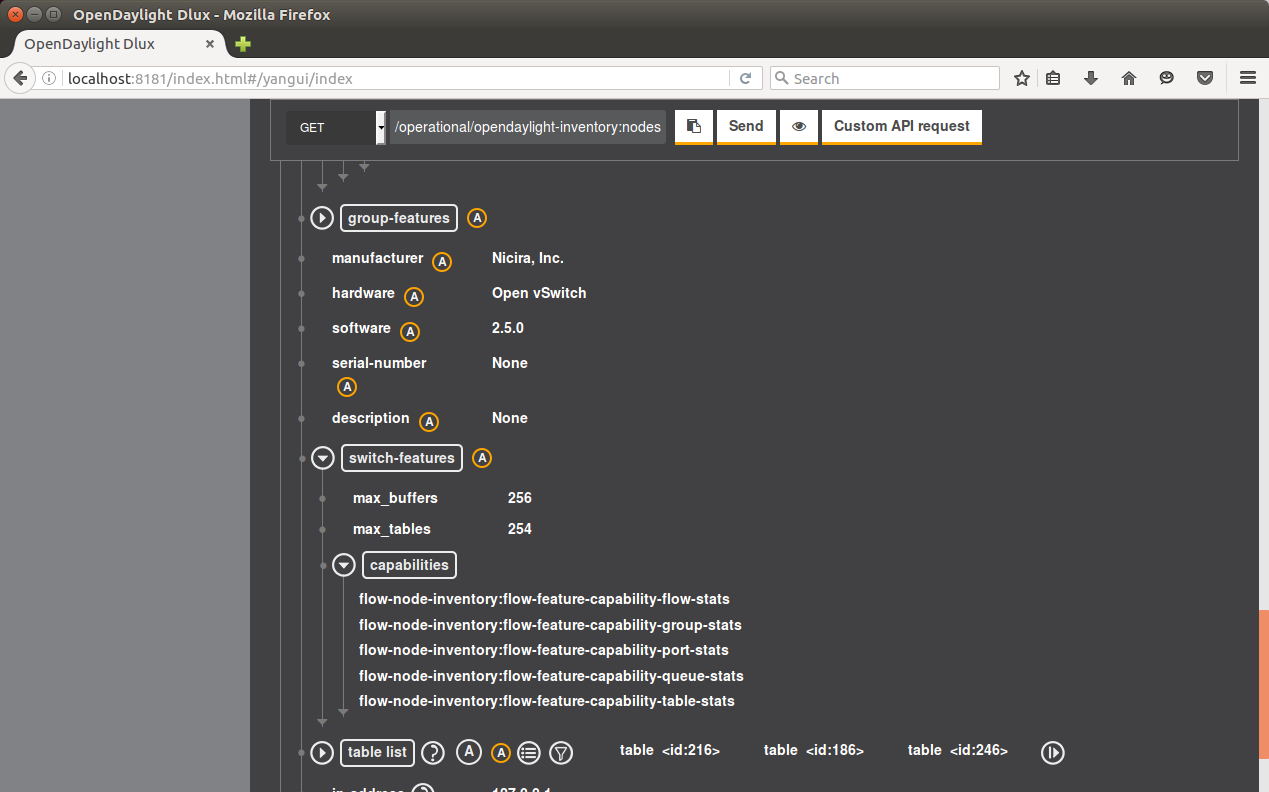
Being the programmatic type, though, we don’t need to use the UI for this. We can 1) query the controller over a RESTful interface or 2) query the switch directly.
To query the switch for all flows in place on the switch,
enter dpctl dump-flows or sh ovs-ofctl -O OpenFlow13 dump-flows s1 at the
Mininet prompt. This is direct interaction with OpenVSwitch.

To query ODL’s RESTful API, use cURL. Even though we haven’t manually inserted flows yet, you can see a number exist.
curl -u admin:admin -H "Accept: application/xml" -X GET http://localhost:8181/restconf/operational/opendaylight-inventory:nodes | xmllint --format -
Coordinating Our Network
Now, after all that work, we have what we would’ve had if we just plugged 3 hosts into any generic switch… What we can do now, though, is manipulate traffic flows in real time and universally across all the network in the controller’s domain. To demonstrate this, we’ll use OpenFlow to direct traffic destined to host 2 from host 1 to host 3 instead, and rewrite the layer 2 and layer 3 addresses to make it look to host 1 like the communication is truly with host 2.
We’re going to use ODL’s REST API for this, and cURL to interact with the API.
Check out connectivity
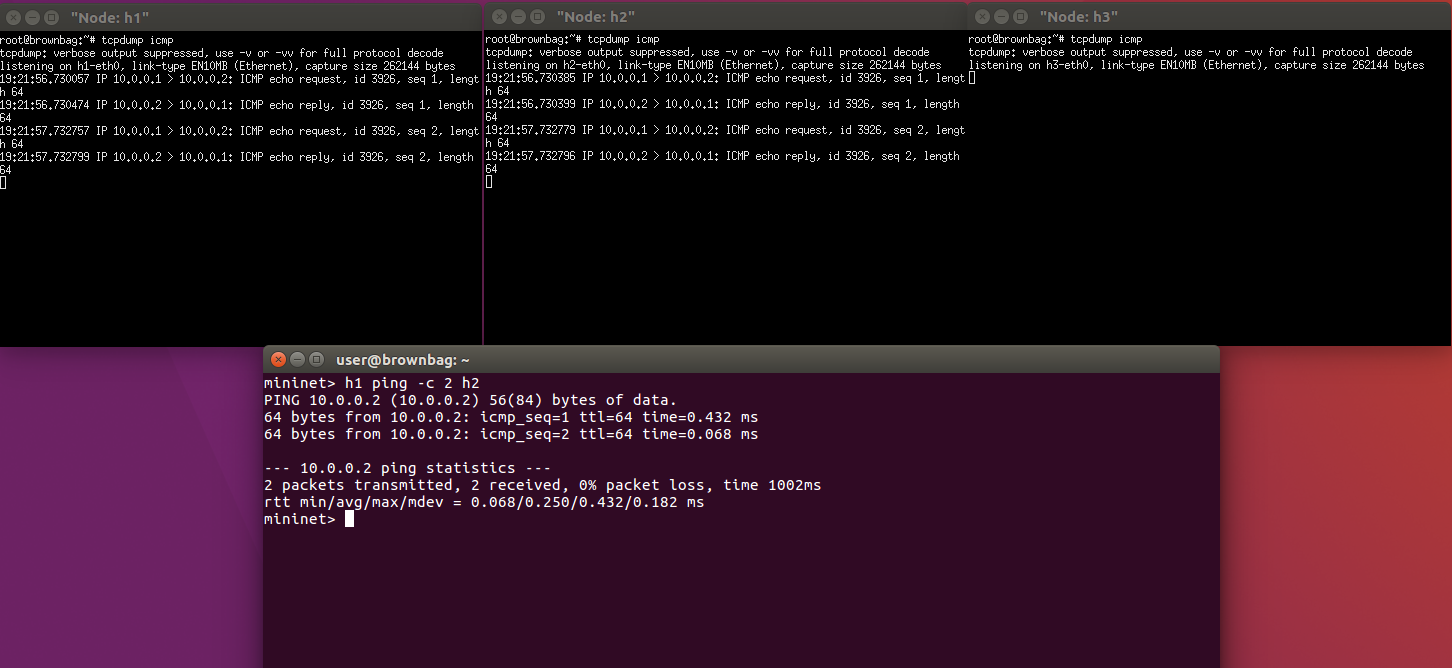
To make sure we’re starting with a clean slate, let’s watch ping traffic between the three hosts.
> xterm h1 h2 h3
In the each of the new terminals (one on each emulated host), start
tcpdump icmp. Then, from the Mininet prompt, run h1 ping -c 2 h2. You should
see two rounds of ping request/response between h1 and h2 (the same is true
with ping to/from any host right now).
Now let’s prevent h1 from bothering h2 (pretend he’s a malicious host, or just annoying). To insert flows, ODL accepts XML and JSON describing the match and actions in PUT payloads (remember a flow is a match + action). Defining matches and actions is really at the core of what makes software defined networking so powerful, but in the interest of time I’ve already defined the flows that will accomplish this in flow_redirect_fl.xml and flow_redirect_rl.xml (fl = forward link, rl = reverse link). Read through these, cause they are what determines the flows and behavior of the network (so download them too, we need ‘em to reference locally). It’s really the meat of this whole process. The highlights include:
- Matching the 4-tuple source and destination L2 and L3 addresses over ethernet.
- Rewriting the destination L2 and L3 addresses (for the forward flow) and the source L2 and L3 addresses (for the reverse flow).
- Setting the new output port for modified traffic.
- Setting a priority for the flow (flows and actions are executed in order of priority).
- Storing this flow in table 0, flow 1 (forward link) and flow 2 (reverse link).
So now things get good, let’s put the first flow in place!
curl -u admin:admin -H "Accept: application/xml" -H "Content-type: application/xml" -d @sdn-bbag/flow_redirect_fl.xml -X PUT http://localhost:8181/restconf/config/opendaylight-inventory:nodes/node/openflow:1/table/0/flow/1
To view the flows on the controller:
curl -u admin:admin -H "Accept: application/xml" -X GET http://localhost:8181/restconf/config/opendaylight-inventory:nodes | xmllint --format -
Note: The restconf/config/ endpoint deals only with the manually placed flows, which is why you don’t see all the implicitly added flows from earlier that were returned by the restconf/operational/ endpoint.
Now let’s repeat the ping test.
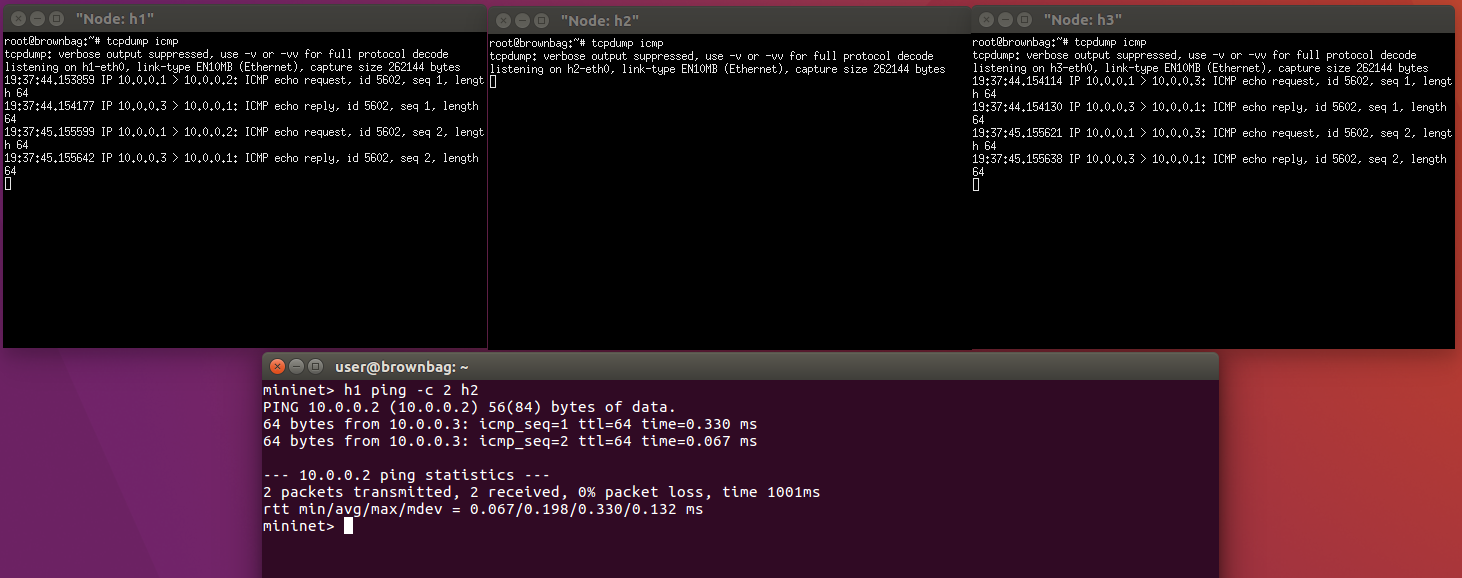
Nice, the requests never went to h2, they were redirected to h3. Notice also though that the responses back to h1 say they come from h3… not very stealthy. So let’s insert the reverse link flow and fix that.
curl -u admin:admin -H "Accept: application/xml" -H "Content-type: application/xml" -d @sdn-bbag/flow_redirect_rl.xml -X PUT http://localhost:8181/restconf/config/opendaylight-inventory:nodes/node/openflow:1/table/0/flow/2
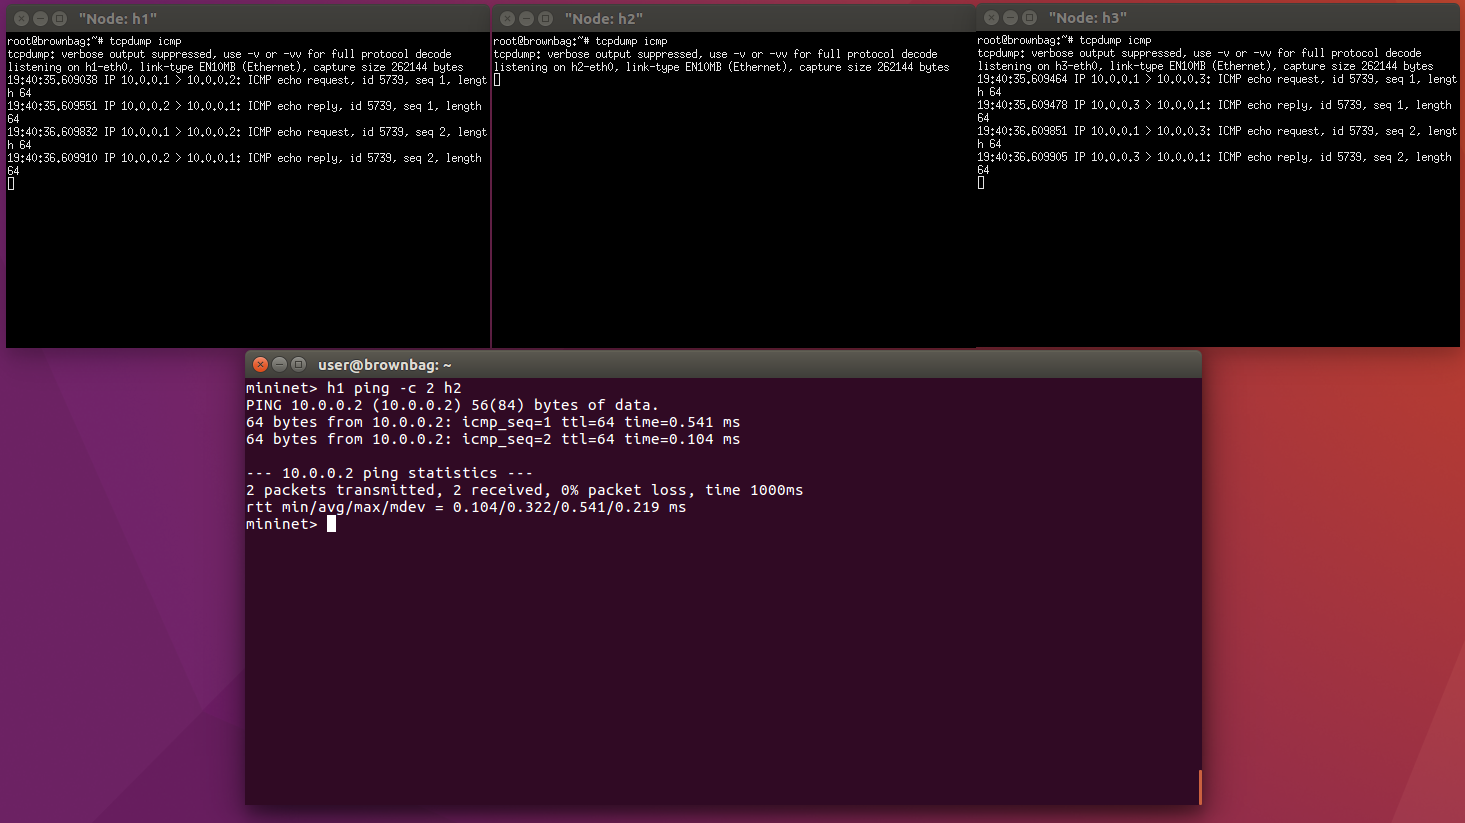
The controller redirects and rewrites addresses in both directions. Responses to h1’s pings say they’re from h2, but notice h2 never even gets any icmp traffic. In the end, we have perfect transparent redirect from h1 -> h2; h1 thinks it’s getting authentic responses from h2, but h2 never even knows about it, h3 is handling all traffic from h1 on its behalf.
Success!
References
-
The inspiring exercise by Barrineau: https://floodlight.atlassian.net/wiki/display/floodlightcontroller/How+to+Perform+Transparent+Packet+Redirection+with+OpenFlow+and+Floodlight ↩
-
GENI Workshop page: https://www.bu.edu/hic/2016/04/15/geni-regional-workshop-and-summer-camp-2016/ ↩

Leave a Comment